Rainsmart Ellipse Soakaway Set Assembled 1 Cubic Metre
| Code | 90004M3 |
|---|
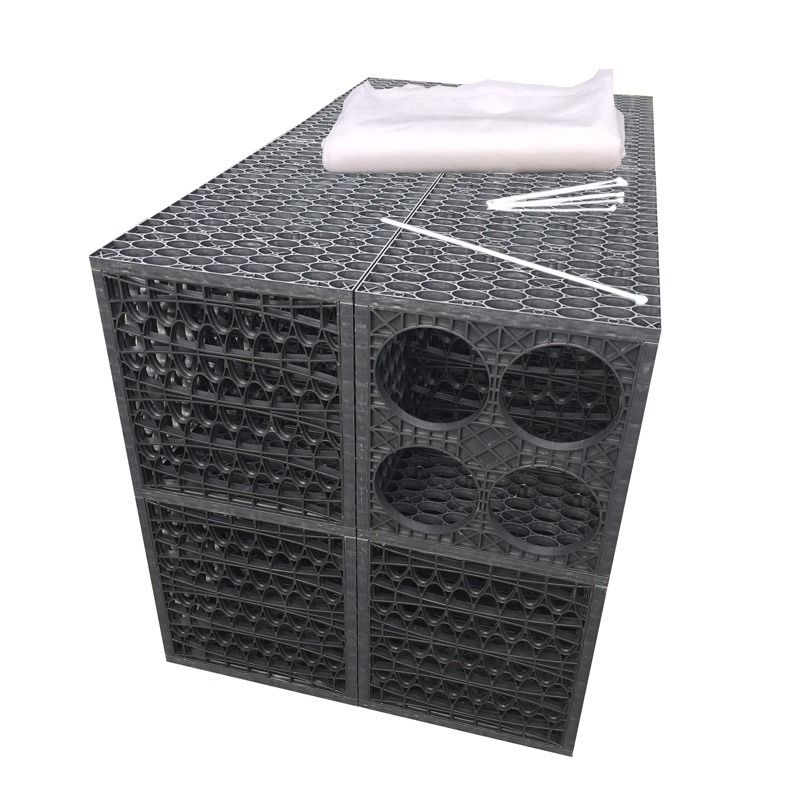
This soakaway set is comprised of four Rainsmart Ellipse Soakaway Crates (24.2-tonne vertical load capacity) and sufficient non-woven geotextile membrane to wrap all outward faces of the soakaway including the base. The set also includes cable ties for holding the crates together until the side fill has been introduced.
The crates in this set are fully assembled, but you could save £30 + VAT if you buy the flat-packed version. Assembly is a very quick process, the full cubic metre set should take no more than 10-12 minutes and we throw in the rubber mallet that you need for assembly. You can view a quick video on assembling flat-packed soakaways here.
To watch a short video of what is included in this soakaway set, please click here.
Size, load and capacity
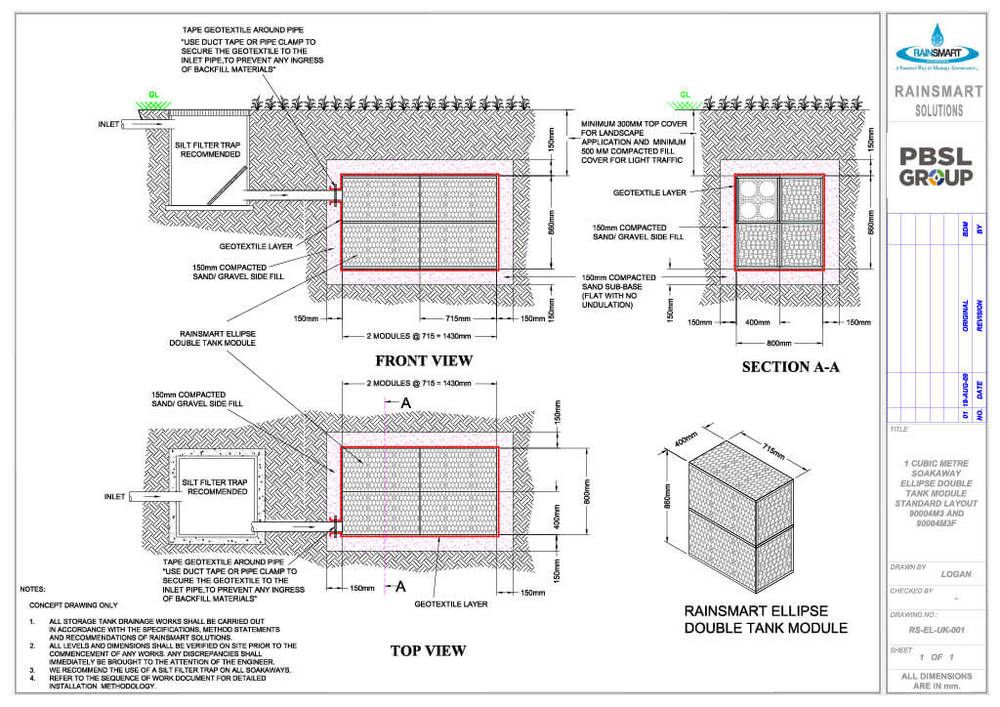
The dimensions of the complete soakaway are 1430mm (L) x 800mm (W) x 860mm (D)
Rainsmart soakaway crates have a void ratio of 95% - this is the amount of free space within the crate structure that can be used for rainwater storage. The capacity of this 1 cubic metre soakaway is an impressive 935 Litres. Under normal conditions, this would be sufficient to hold water from a roof area of approximately 50 square metres.
The vertical crush load capacity of 24.2 tonnes per square metre ensures that the Rainsmart Ellipse crates are safe to be used beneath gardens and pedestrian areas. The lateral crush load of 18 tonnes per square metre is the best of any type of soakaway crate currently available in the UK.
Joining crates together
Clips are not required to hold the crates together. No clips on any crate system are structural, it is always the side fill on any soakaway installation which adds the stability needed to hold the structure in place. Cable Ties are included with our 1m³ Soakaway Sets and these are used purely to hold the crates in place until the sand or gravel side fill has been added.
Consider a pre-filter
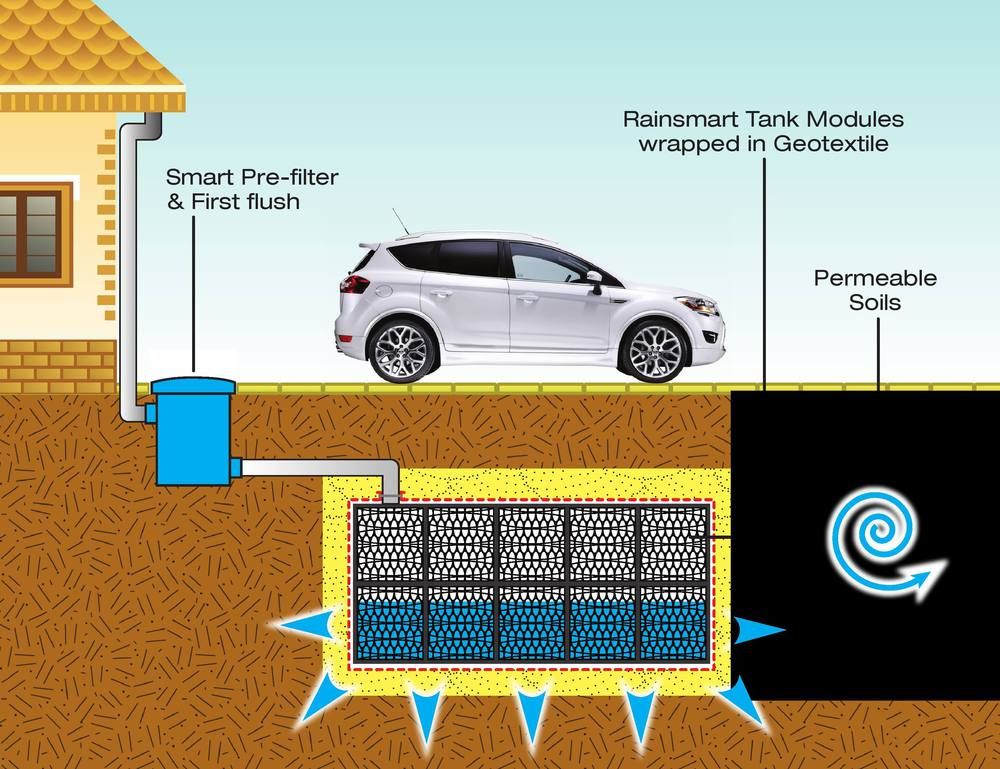
For best practice, we always recommend that a pre-filter such as our Sentinel Silt Trap is used in conjunction with any modular soakaway system. Emptying the filter on a regular basis (this is only a five-minute job) will maintain the efficiency of the soakaway and greatly increase its lifespan.
All outward-facing crate surfaces of any soakaway should be wrapped in a non-woven geotextile membrane, which allows the free passage of water but prevents any soil or sand particles from entering the soakaway, maintaining its long term efficiency.
Connecting Pipes to Soakaways
The 110mm (or 160mm) drainage pipe is fed into the soakaway via one of the four circular 160mm open entry points. 110mm pipes simply rest on the bottom of this opening and we recommend that the pipe is inserted approximately 150mm inside the crate. Geotextile membrane should be installed over the opening first and then a small cross should be cut in the membrane at the entry point with a sharp knife. Carefully peel back the membrane, insert the pipe and tape or clamp the membrane tightly around the outside of the pipe to stop the ingress of any soil particles.
As all four crates making up the soakaway set have a pipe entry plate, you should ensure that the three that are not being used face inside the soakaway as opposed to facing outwards, this makes it easier to wrap the geotextile around the outside of the structure. Pipe entry points do not affect the structural integrity of the soakaway in any way.
For a closer look at Soakaway Crates in general, including installation tips, please take a look at our detailed video.


